How a Browser Works: A Beginner-Friendly Guide to Browser Internals
Learn how browsers transform a URL into pixels on your screen. Understand DOM, CSSOM, rendering engines, and the complete journey from pressing Enter to seeing a webpage.
10 min read
Share
- What Is a Browser, Really?
- The Main Parts of a Browser
- 1. User Interface (UI)
- 2. Browser Engine
- 3. Rendering Engine
- 4. JavaScript Engine
- 5. Networking
- 6. Data Storage
- What Happens When You Type a URL?
- Step 1: URL Parsing & DNS Lookup
- Step 2: HTTP Request/Response
- Step 3: Receiving Resources
- HTML Parsing and DOM Creation
- What is the DOM?
- Example: HTML to DOM
- CSS Parsing and CSSOM Creation
- What is the CSSOM?
- How DOM and CSSOM Come Together
- The Render Tree
- Example
- Layout: Calculating Positions
- What Layout Calculates:
- Painting: Adding Colors and Pixels
- Paint Order
- Compositing and Display
- Why Layers?
- Understanding Parsing with a Simple Example
- Step 1: Tokenization (Lexing)
- Step 2: Build a Tree (AST)
- Step 3: Evaluate
- The Complete Picture
- Key Takeaways
- Don't Stress!
- Further Reading
- Conclusion
Have you ever wondered what really happens after you type a URL and press Enter? As developers, we spend countless hours writing code that runs in browsers, but how many of us truly understand what's happening under the hood?
In this guide, I'll take you on a journey through browser internals – from the moment you hit Enter to the final pixels appearing on your screen.
What Is a Browser, Really?
Most people think of a browser as "the thing that opens websites." And they're not wrong – but there's so much more to it.
Think of it this way
A browser is like a sophisticated translator and artist combined. It takes code (HTML, CSS, JavaScript) and transforms it into the beautiful, interactive pages you see and click on every day.
At its core, a browser is a software application that:
- Fetches resources from the internet
- Interprets and parses code
- Renders visual content
- Executes JavaScript
- Handles user interactions
Popular browsers include Chrome (using Blink engine), Firefox (Gecko engine), Safari (WebKit), and Edge (also Blink-based).
The Main Parts of a Browser
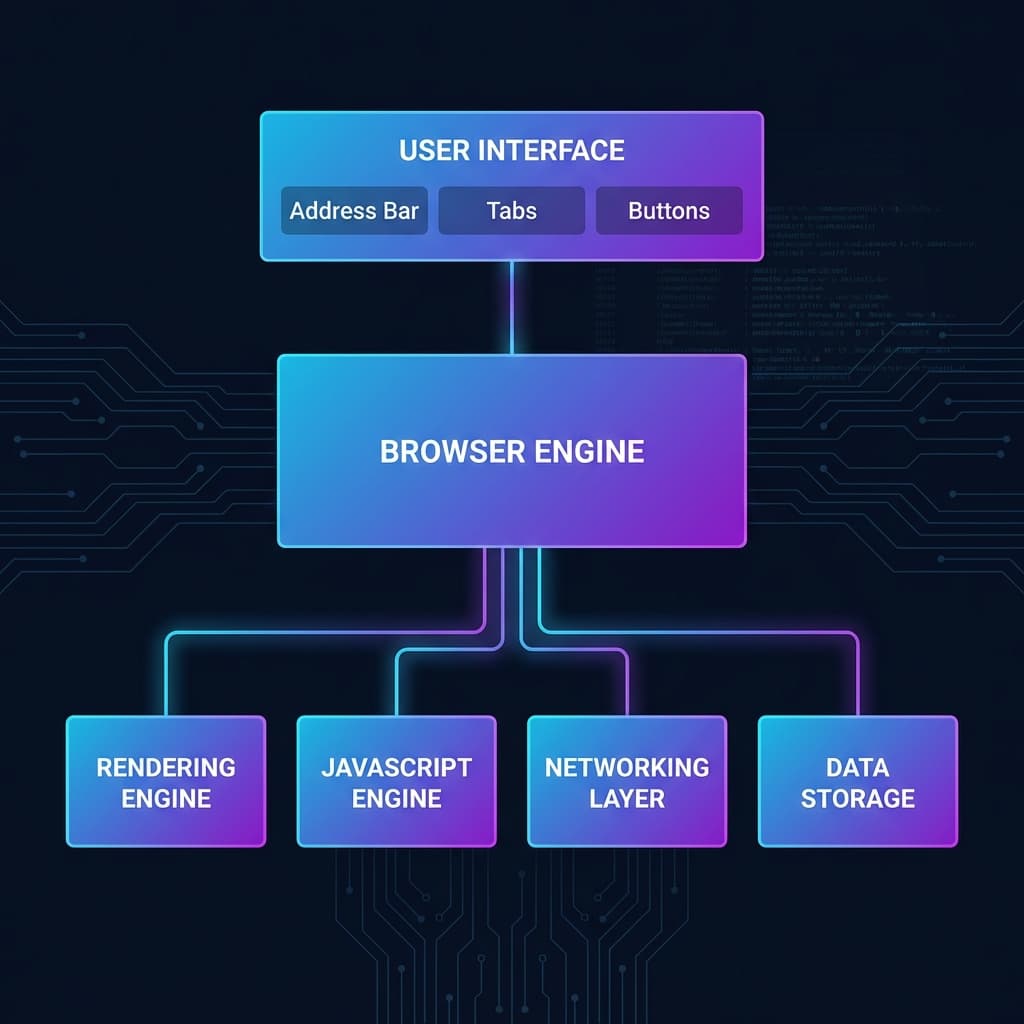
Before we dive deep, let's understand the high-level architecture:
Browser architecture showing User Interface, Browser Engine, and core components
1. User Interface (UI)
Everything you see except the webpage itself:
- Address bar – where you type URLs
- Back/Forward buttons – navigation controls
- Tabs – multiple pages in one window
- Bookmarks bar – your saved sites
2. Browser Engine
The coordinator that marshals actions between the UI and the rendering engine. Think of it as the project manager of the browser.
3. Rendering Engine
The heart of the browser – responsible for displaying content. Different browsers use different engines:
| Browser | Rendering Engine |
|---|---|
| Chrome, Edge | Blink |
| Firefox | Gecko |
| Safari | WebKit |
4. JavaScript Engine
Executes JavaScript code:
- V8 (Chrome, Edge, Node.js)
- SpiderMonkey (Firefox)
- JavaScriptCore (Safari)
5. Networking
Handles HTTP requests, caching, and resource fetching.
6. Data Storage
Manages cookies, localStorage, IndexedDB, and cache.
What Happens When You Type a URL?
Let's trace the complete journey from URL to pixels:
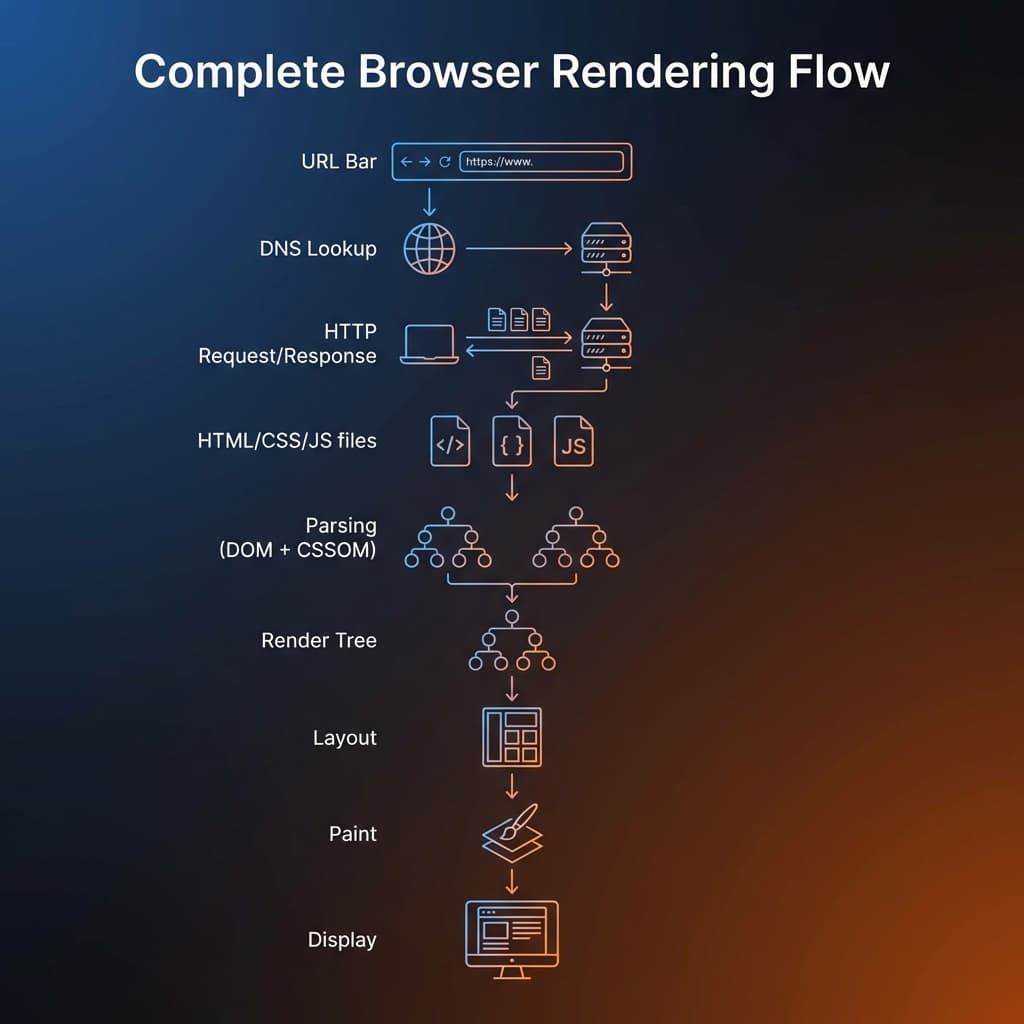 Complete browser rendering flow from URL to pixels on screen
Step 1: URL Parsing & DNS Lookup
When you type https://example.com and press Enter:
1. Browser parses the URL
2. Checks cache for DNS record
3. If not cached, queries DNS server
4. DNS returns IP address (e.g., 93.184.216.34)
DNS is like a phonebook
Just like you look up a person's name to find their phone number, DNS looks up a domain name to find its IP address.
Step 2: HTTP Request/Response
GET / HTTP/1.1
Host: example.com
User-Agent: Chrome/120.0
Accept: text/html
The server responds with HTML, along with headers telling the browser about caching, content type, and more.
Step 3: Receiving Resources
The browser receives:
- HTML – the structure
- CSS – the styles
- JavaScript – the behavior
- Images, fonts, etc. – assets
Step through the pipeline that turns bytes into pixels:
1/5
HTML Parsing and DOM Creation
This is where the magic begins. The browser takes raw HTML text and creates a Document Object Model (DOM).
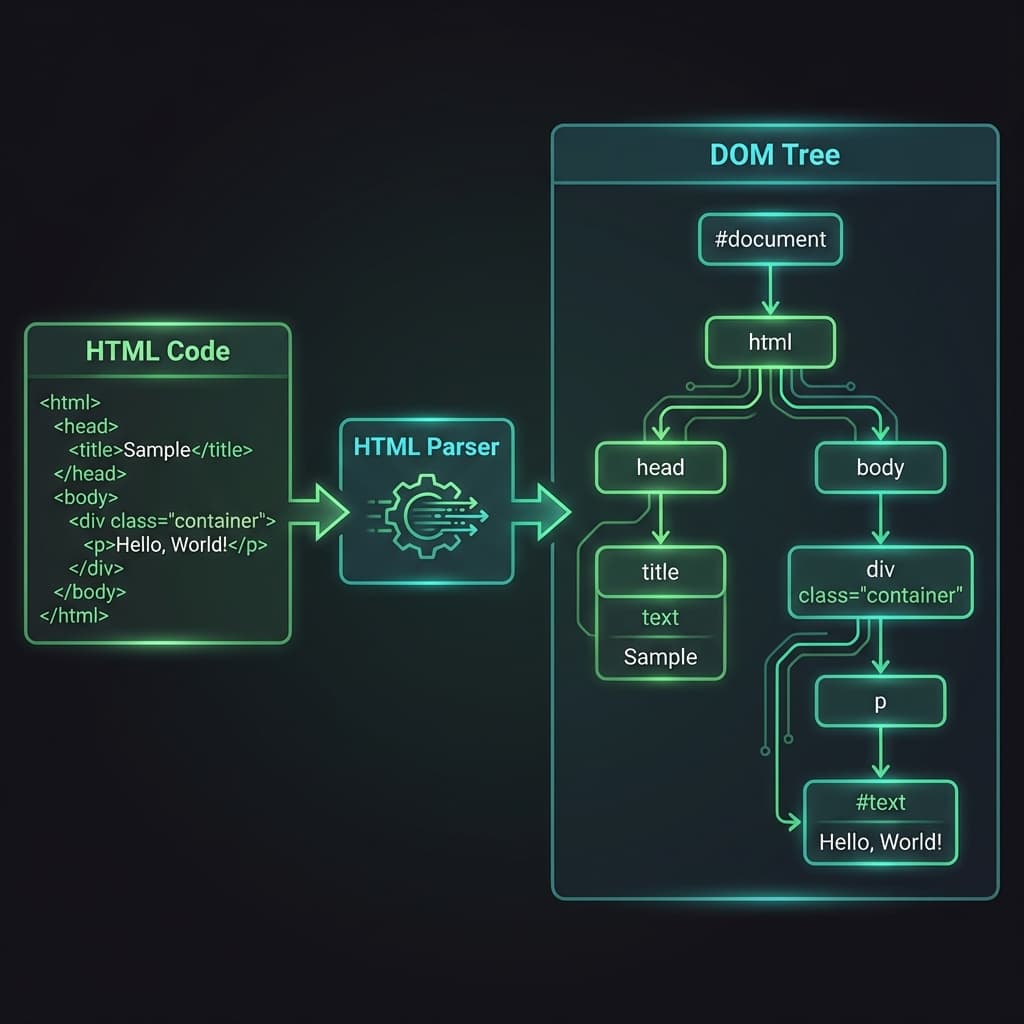 HTML to DOM creation flow showing parser transforming code into tree structure
What is the DOM?
The DOM is a tree-like structure representing your HTML document. Each element becomes a "node" in this tree.
Info
Think of the DOM like a family tree. The <html> tag is the grandparent, <head> and <body> are parents, and all other elements are children, grandchildren, and so on.
Example: HTML to DOM
<!DOCTYPE html>
<html>
  <head>
    <title>My Page</title>
  </head>
  <body>
    <div class="container">
      <h1>Hello World</h1>
      <p>Welcome to my site</p>
    </div>
  </body>
</html>
This becomes a tree structure:
Document
└── html
    ├── head
    │   └── title
    │       └── "My Page"
    └── body
        └── div.container
            ├── h1
            │   └── "Hello World"
            └── p
                └── "Welcome to my site"
CSS Parsing and CSSOM Creation
While the DOM is being built, the browser also parses CSS to create the CSS Object Model (CSSOM).
What is the CSSOM?
Similar to the DOM, the CSSOM is a tree structure – but for styles. It contains all the CSS rules that will be applied to elements.
body {
  font-family: 'Inter', sans-serif;
  background: #1a1a1a;
}

.container {
  max-width: 1200px;
  margin: 0 auto;
}

h1 {
  color: #f97316;
  font-size: 2.5rem;
}
CSS is render-blocking
The browser won't render anything until the CSSOM is complete. This is why we put CSS in the <head> – to download it as early as possible.
How DOM and CSSOM Come Together
Now we have two trees – DOM and CSSOM. The browser combines them to create the Render Tree.
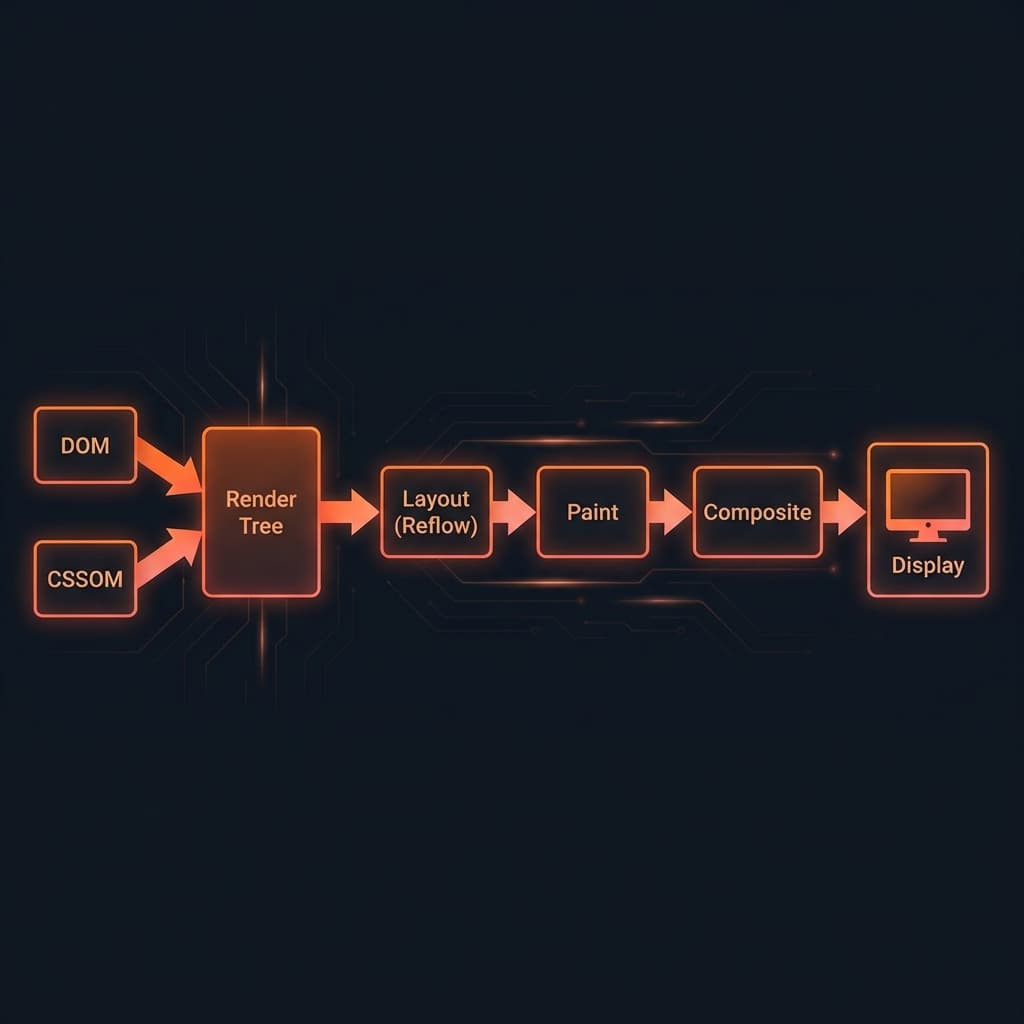 Render pipeline showing DOM and CSSOM merging into Render Tree, then Layout, Paint, and Display
The Render Tree
The Render Tree contains only the visible elements with their computed styles:
- Elements with
display: noneare not included - Elements with
visibility: hiddenare included (they still take up space) - Pseudo-elements like
::beforeare included
Example
<div style="display: none">Hidden</div>
<div style="visibility: hidden">Invisible but present</div>
<div>Visible</div>
Render Tree will contain:
- The invisible div (takes space)
- The visible div
- NOT the hidden div
Layout: Calculating Positions
Once we have the Render Tree, the browser calculates the exact position and size of every element. This process is called Layout (or Reflow).
What Layout Calculates:
- Width and height of each element
- Position on the page (x, y coordinates)
- How elements flow around each other
- Effects of margins, padding, borders
// This triggers a layout recalculation!
element.style.width = "500px";

// So does this
const width = element.offsetWidth; // Reading layout properties
Performance Warning
Avoid triggering layout repeatedly in loops. Reading layout properties (like offsetWidth) forces the browser to recalculate layout, which is expensive.
Painting: Adding Colors and Pixels
After layout, the browser knows where everything goes. Now it needs to draw it. This is Painting.
Painting fills in:
- Text – font, color, size
- Colors – backgrounds, borders
- Shadows – box-shadow, text-shadow
- Images – decoded and placed
Paint Order
The browser paints in a specific order (simplified):
- Background color
- Background image
- Border
- Children
- Outline
Compositing and Display
Modern browsers use compositing – breaking the page into layers that can be painted independently and combined.
Why Layers?
.animated-element {
  transform: translateX(100px);
  will-change: transform;
}
Elements with transform, opacity, or will-change often get their own compositor layer. This means they can animate without triggering layout or paint of other elements!
Performance Hack
Use transform and opacity for animations instead of top, left, width, or height. They're much more performant because they only require compositing, not layout or paint.
Understanding Parsing with a Simple Example
Let's demystify "parsing" with a simple math expression:
Expression: 3 + 5 * 2
How would a parser understand this?
Step 1: Tokenization (Lexing)
Break the expression into tokens:
const tokens = [
  { type: "NUMBER", value: 3 },
  { type: "OPERATOR", value: "+" },
  { type: "NUMBER", value: 5 },
  { type: "OPERATOR", value: "*" },
  { type: "NUMBER", value: 2 }
];
Step 2: Build a Tree (AST)
Following math rules (multiplication before addition):
        +
       / \
      3   *
         / \
        5   2
Step 3: Evaluate
5 * 2 = 10
3 + 10 = 13
HTML parsing works similarly – the browser tokenizes HTML tags, builds a DOM tree, and the rendering engine "evaluates" it visually.
The Complete Picture
Let's recap the entire flow:
| Step | What Happens | Output |
|---|---|---|
| 1. URL Entry | User types URL | HTTP Request |
| 2. DNS Lookup | Domain → IP Address | Server location |
| 3. HTTP Response | Server sends files | HTML, CSS, JS |
| 4. HTML Parsing | Text → Tree structure | DOM |
| 5. CSS Parsing | Styles → Tree structure | CSSOM |
| 6. Render Tree | DOM + CSSOM | Visible elements with styles |
| 7. Layout | Calculate positions | Geometry data |
| 8. Paint | Fill in pixels | Layer images |
| 9. Composite | Combine layers | Final frame |
| 10. Display | Show on screen | Pixels! |
Key Takeaways
Remember These
- DOM is a tree representation of your HTML
- CSSOM is a tree representation of your CSS
- Render Tree = DOM + CSSOM (only visible elements)
- Layout calculates where things go
- Paint fills in the pixels
- Compositing combines layers for the final image
Don't Stress!
You don't need to memorize every detail. Understanding the flow is what matters:
URL → Fetch → Parse → Render Tree → Layout → Paint → Display
As you continue building web applications, you'll naturally develop intuition about:
- Why CSS-in-JS has performance implications
- Why
requestAnimationFrameis smoother thansetTimeout - Why virtual DOM libraries exist
- Why Core Web Vitals matter
Further Reading
- How Browsers Work (HTML5 Rocks)
- Inside look at modern web browser (Chrome Developers)
- Rendering Performance (web.dev)
Conclusion
Understanding browser internals transforms you from someone who uses browsers to someone who understands them. This knowledge helps you:
- Write more performant code
- Debug rendering issues faster
- Make better architectural decisions
- Ace technical interviews!
The next time you press Enter on a URL, you'll know exactly what's happening behind the scenes – a beautiful orchestration of networking, parsing, styling, layout, and painting, all happening in milliseconds.
Happy coding! 🚀
Have questions about browser internals? Drop a comment or reach out on Twitter @srtenginamath!

Written by Sharanayya R Tenginamath
Software Engineer at McD BERL with 4+ years building scalable full-stack applications with React.js, Next.js, TypeScript, FastAPI and Python. Available to join from Oct 12, 2026.
Related articles
- CSS
- Web Development
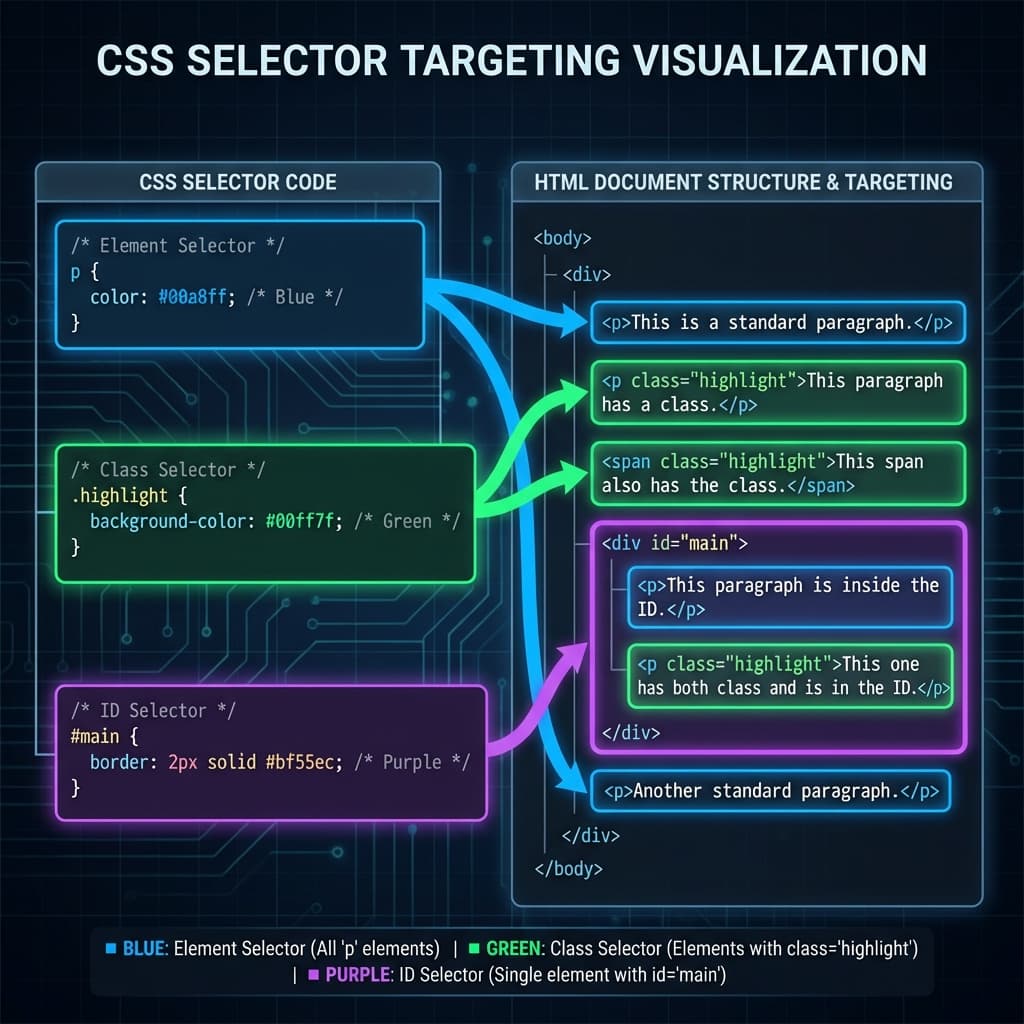
CSS Selectors 101: Targeting Elements with Precision
Master CSS selectors from basics to advanced. Learn element, class, ID, group, and descendant selectors with practical examples. Build a solid foundation for styling web pages.
11 min read
- JavaScript
- Async
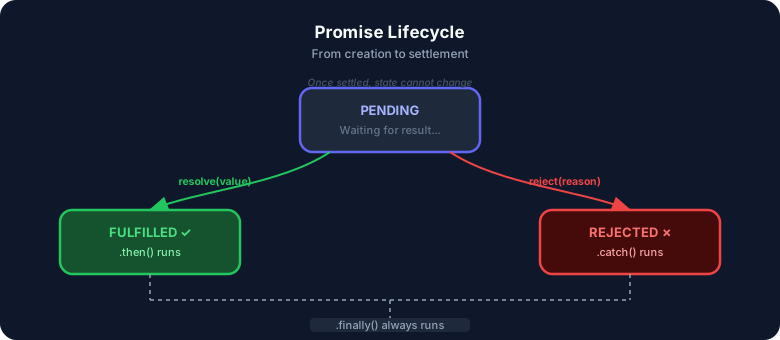
JavaScript Promises : The Complete Guide to Async Code
Master JavaScript Promises from scratch — lifecycle, .then()/.catch()/.finally(), all static methods (all, allSettled, race, any), real-world examples, visual diagrams, and hands-on assignments. Written from 4+ years of full-stack development experience.
17 min read
- JavaScript
- Web Development
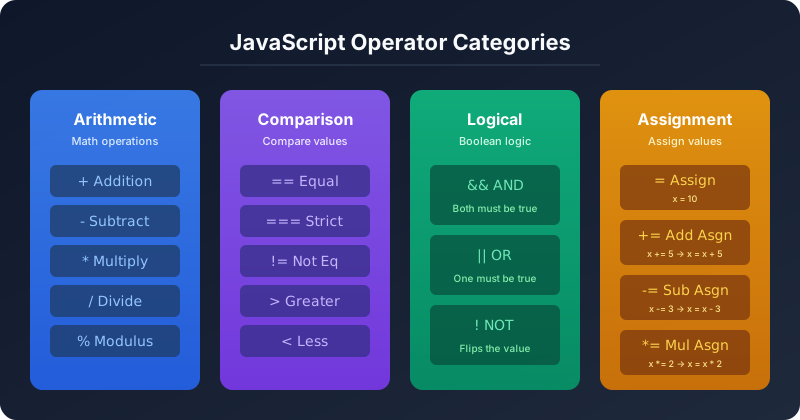
JavaScript Operators — The Basics You Need to Know
Master JavaScript operators — arithmetic, comparison, logical, and assignment — with real-world examples, visual diagrams, truth tables, and hands-on assignments. A practical guide from 4+ years of full-stack development.
19 min read